In this article, you will learn the essential steps to successfully repot an aloe plant. By explaining the process in a clear and concise manner, incorporating relatable language, and providing informative visuals, this guide aims to assist you in effectively repotting your aloe plant. With a focus on real-time data and practical tips, you will gain the necessary knowledge to give your aloe plant a healthy and thriving environment.
Choosing the Right Pot
Determining the size of the new pot
When it comes to choosing the right pot for your aloe plant, size matters. You need to choose a pot that allows enough room for the plant’s roots to spread and grow. A general rule of thumb is to select a pot that is 1-2 inches larger in diameter than the current pot. This will give the plant enough space to thrive without overwhelming it with a pot that is too big.
Selecting a well-draining pot
Another crucial factor to consider when choosing a pot for your aloe plant is its drainage capabilities. Aloe plants have shallow roots that are susceptible to root rot if they sit in waterlogged soil for extended periods. Therefore, it is essential to select a pot with good drainage to prevent water from pooling at the bottom. Look for pots that have drainage holes in the bottom and avoid pots made of materials that don’t allow for proper water drainage.
Choosing a pot with a drainage hole
While it may seem obvious, it is worth emphasizing the importance of choosing a pot with a drainage hole. Aloe plants, like many other houseplants, require well-draining soil to thrive. Without proper drainage, excess water can accumulate in the pot, leading to root rot and potentially killing the plant. When selecting a pot, ensure it has at least one drainage hole in the bottom to allow excess water to escape freely.
Preparing the Pot and Soil
Cleaning the pot
Before repotting your aloe plant, it is crucial to clean the new pot thoroughly. If you are reusing a pot, ensure you wash it with warm, soapy water to remove any potential pathogens or residue from previous plants. Cleaning the pot helps maintain a healthy environment for your aloe plant and reduces the risk of diseases.
Preparing the soil mixture
The soil mixture you choose will greatly impact the health and growth of your aloe plant. A well-draining soil mixture is essential to ensure the plant’s roots do not become waterlogged. To prepare the soil, mix equal parts of cactus soil, perlite, and sand. This mixture provides excellent drainage while retaining enough moisture for the plant. Avoid using heavy, dense potting soils, as they tend to retain water and can lead to root rot.
Removing the Aloe Plant from its Current Pot
Watering the plant beforehand
Before repotting your aloe plant, it is advisable to give it a thorough watering. This will help hydrate the soil and make it easier to remove the plant from its current pot. Water the plant a day or two before repotting, ensuring the soil is evenly moist but not saturated.
Loosening the soil around the plant
To remove the aloe plant from its current pot, gently loosen the soil around the edges of the pot using your fingers or a small trowel. Be careful not to damage the plant’s roots during this process. Loosening the soil will allow for easier removal and minimize the risk of breaking any delicate roots.
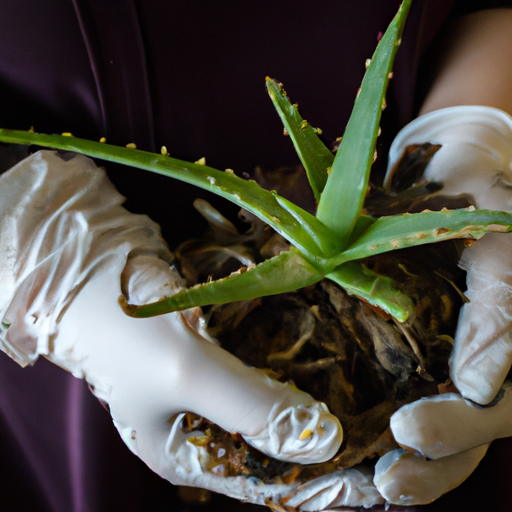
Gently removing the plant from the pot
Once the soil is loosened, turn the pot upside down while supporting the base of the plant. Tap the bottom of the pot or gently squeeze the sides to release the plant and soil. Be cautious not to pull the plant forcefully, as this can cause damage to the roots. Gently lift the plant out of the pot, ensuring no roots are left behind.
Inspecting and Pruning the Roots
Examining the root system
After removing the aloe plant from its pot, take some time to inspect the root system. Look for any damaged, mushy, or discolored roots, as they are signs of root rot or disease. Healthy roots should be firm, whitish in color, and spread out evenly. If you notice any abnormalities, it is crucial to address them promptly to ensure the plant’s health.
Trimming any damaged or rotten roots
If you find any damaged or rotten roots during the inspection, it is essential to trim them to prevent further spread of disease or decay. Using clean, sharp pruning shears, carefully remove the affected roots, cutting close to the base of the plant. Ensure that the remaining roots are healthy before proceeding to the next step.
Placing the Aloe Plant in the New Pot
Adding drainage material to the bottom
Before placing the aloe plant in the new pot, add a layer of drainage material at the bottom. This could be small pebbles, broken pottery shards, or coarse sand. The drainage material will help prevent the soil from becoming waterlogged and aid in proper water drainage.
Positioning the plant in the new pot
Once the drainage material is in place, carefully position the aloe plant in the center of the new pot. Adjust the plant’s height so that the top of the root ball is slightly below the rim of the pot. This will leave enough space for watering without overflow and allows room for future growth.
Filling the pot with fresh soil
After positioning the plant, fill the remaining space in the pot with the prepared soil mixture. Gently firm the soil around the plant to ensure it is stable and well-supported. Avoid compacting the soil too tightly, as this can hinder water drainage and air circulation. Leave a small space between the top of the soil and the pot rim to prevent water from spilling over when watering.
Watering and Caring for the Repotted Aloe Plant
Watering the plant after repotting
After repotting, give your aloe plant a thorough watering. This will help settle the soil and eliminate any air pockets around the roots. Water until it drains freely from the bottom drainage hole, ensuring the entire root system is adequately hydrated. After watering, allow the soil to dry out slightly before watering again. Aloe plants prefer slightly dry conditions, so avoid overwatering to prevent root rot.
Caring for the plant during the initial weeks
During the first few weeks after repotting, it is essential to monitor your aloe plant closely. Keep the plant in a location that receives bright, indirect sunlight, as aloe plants require ample light to thrive. Avoid placing the plant in direct sunlight, as this can lead to sunburn. Additionally, avoid drafts and extreme temperature fluctuations, as aloe plants prefer stable conditions.
Providing the right amount of sunlight and temperature
Aloe plants thrive in bright, indirect sunlight. Place your repotted plant near a window with filtered light or use artificial grow lights if necessary. Adequate sunlight will promote healthy growth and vibrant foliage. Additionally, maintain a temperature range of 60-80°F (15-27°C) for optimal growth. Avoid exposing the plant to temperatures below 50°F (10°C) or above 90°F (32°C) as extreme temperatures can stress the plant.
Common Mistakes to Avoid
Using the wrong type of potting mix
One of the most common mistakes when repotting aloe plants is using the wrong type of potting mix. Avoid heavy, water-retaining soils as they can lead to root rot. Instead, opt for a well-draining mixture of cactus soil, perlite, and sand. This will provide the necessary drainage and airflow for the plant’s roots.
Overwatering the plant
Overwatering is another common mistake that can have detrimental effects on your repotted aloe plant. Aloe plants are succulents and are adapted to thrive in arid conditions. They prefer slightly dry soil, so it is essential to water them sparingly. Allow the soil to dry out between waterings and avoid leaving the plant in waterlogged conditions.
Not acclimating the plant to the new pot
Failing to acclimate your aloe plant to its new pot can cause stress to the plant. To acclimate, gradually introduce the plant to its new environment by placing it in its new pot for a few hours each day initially. Over time, increase the duration until it remains in the new pot permanently. This allows the plant to adjust to the new conditions and minimizes the risk of shock or transplant stress.
In conclusion, repotting an aloe plant is a crucial step in ensuring its continued growth and health. By choosing the right pot, preparing the soil adequately, and carefully removing and inspecting the plant, you can set the foundation for a thriving aloe plant. Taking care during the repotting process and providing the appropriate watering and care afterward will help your aloe plant thrive in its new home. Avoid common mistakes such as using the wrong potting mix, overwatering, and neglecting to acclimate the plant, and you will be well on your way to enjoying a healthy, vibrant aloe plant.


